ReadyNAS config
From Intelligent Materials and Systems Lab
ReadyNAS user guide
This page contains information on the configuration and usage of ReadyNAS 3220 backup storage in IMS cellar.
Configuration
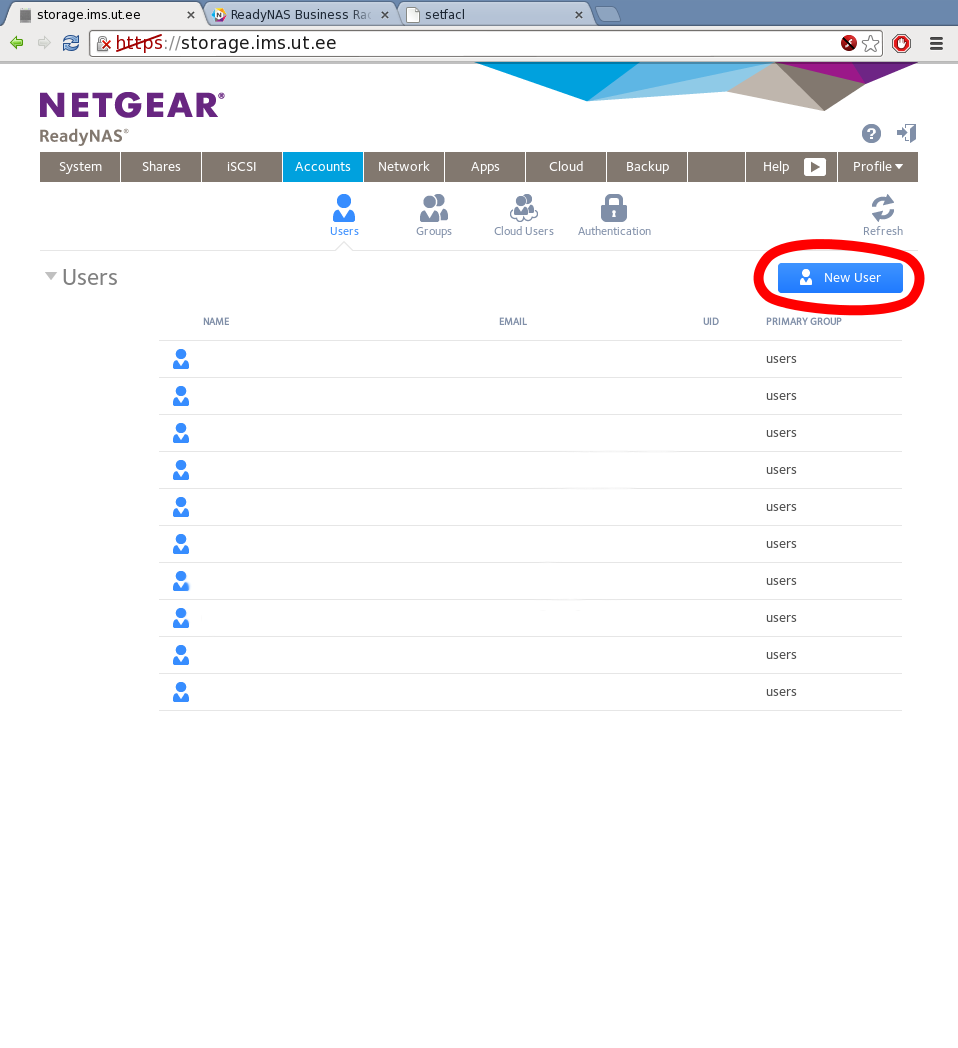
Adding a new user
All new users should be created using the webinterface.
- Step 1
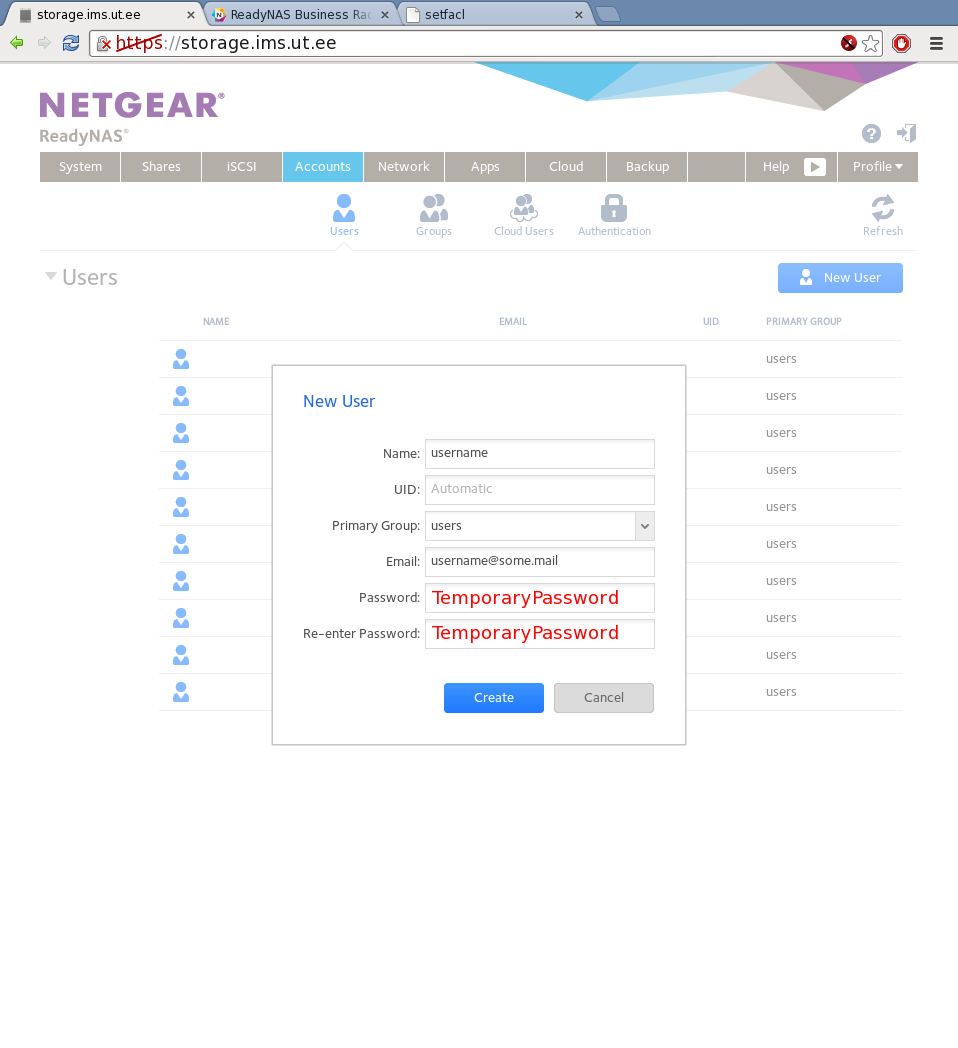
Create a new user
- Step 2
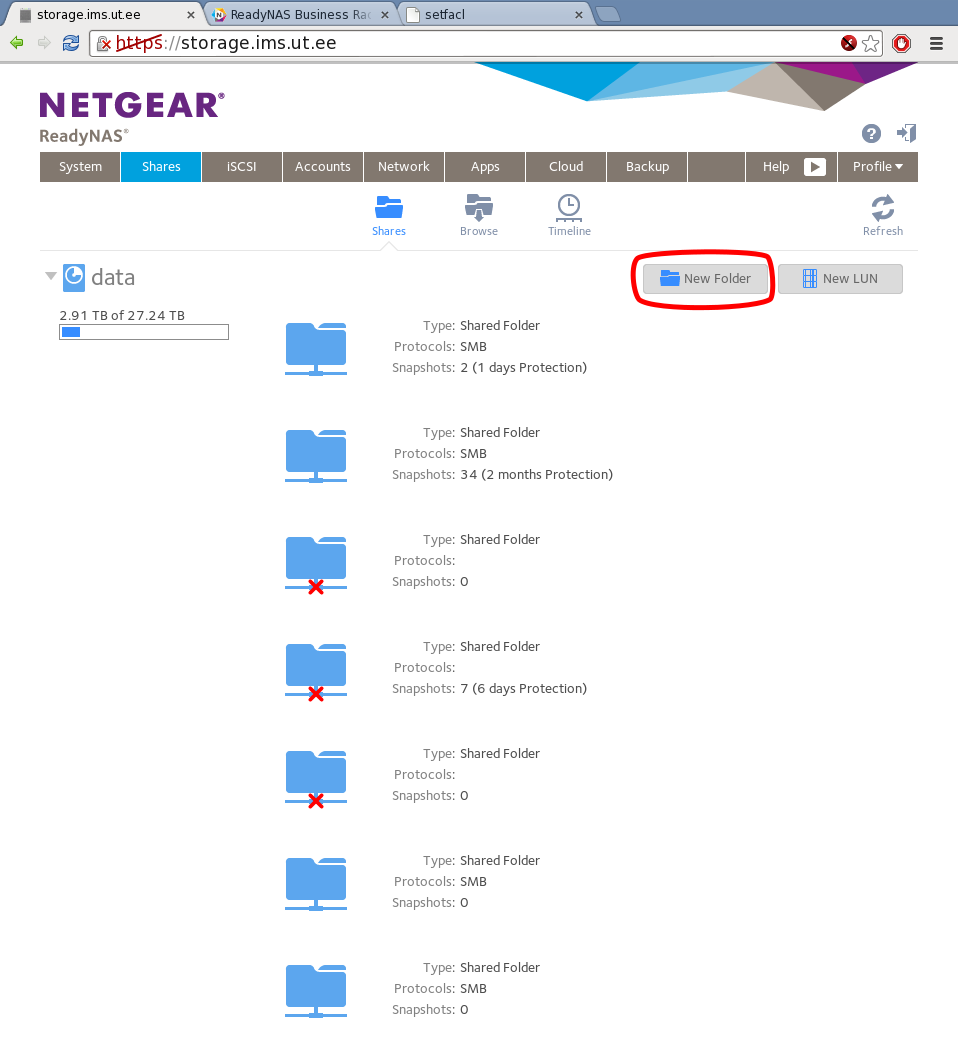
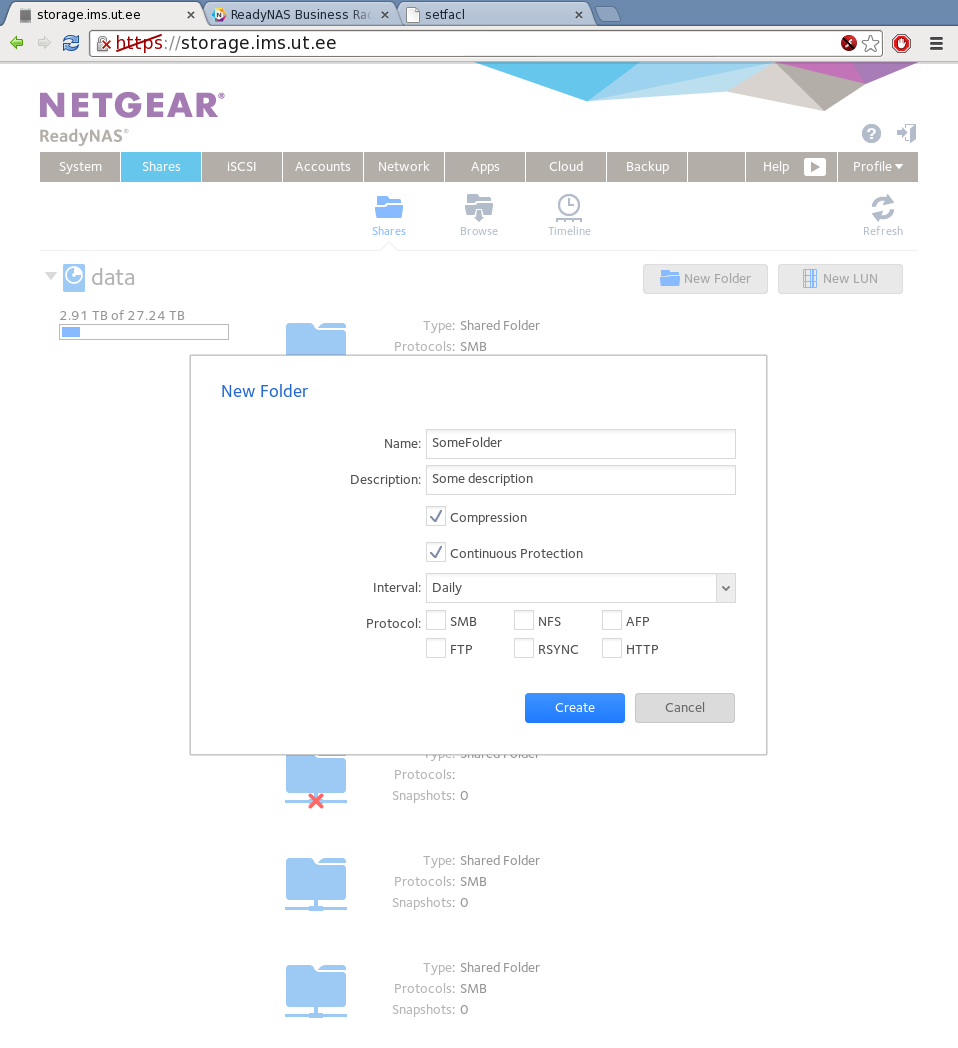
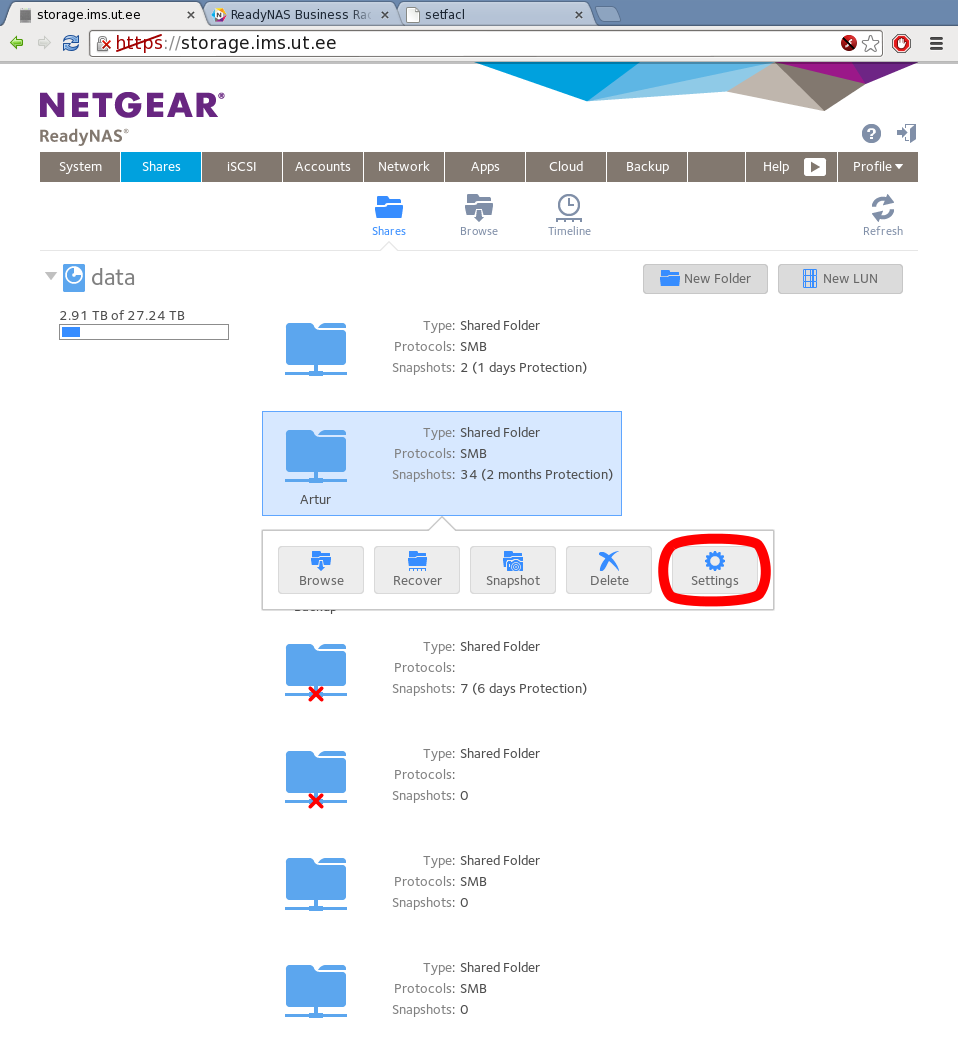
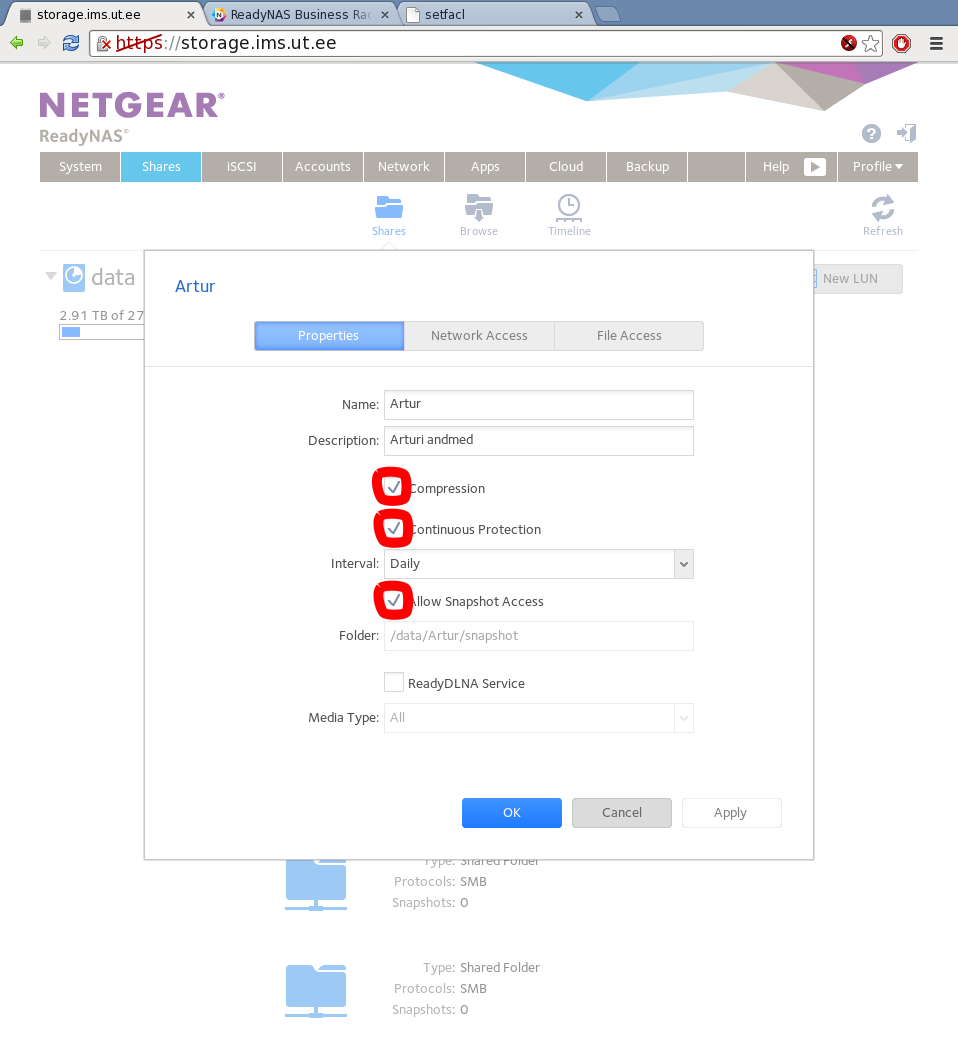
Create a home directory for user
- Step 3
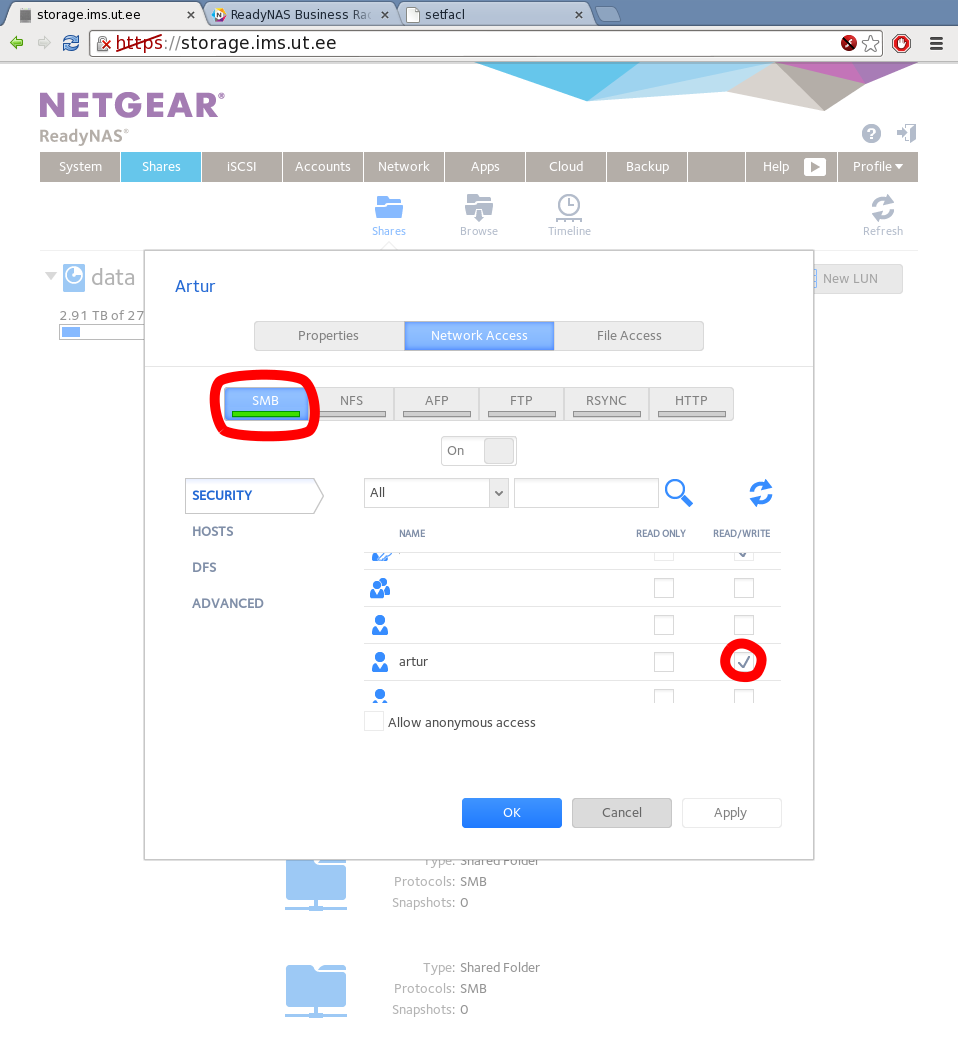
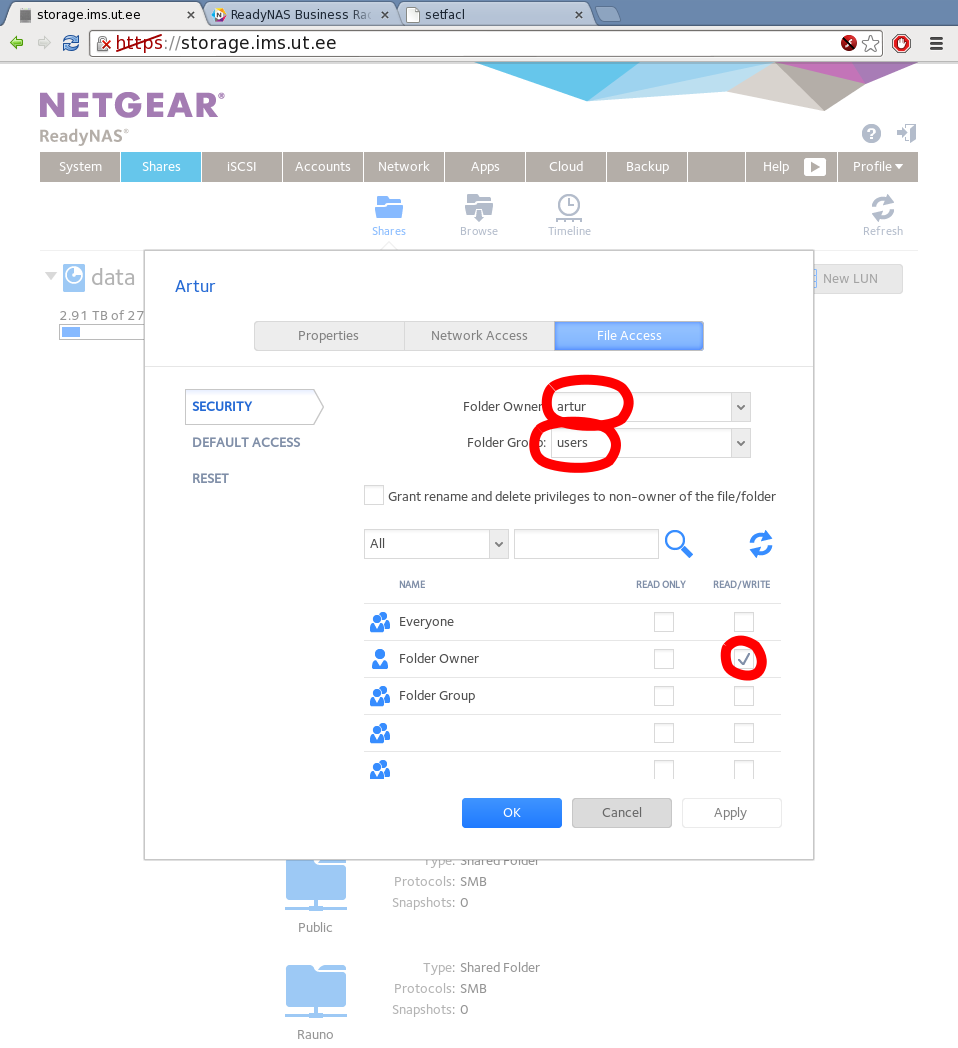
Change folder ownership and add Samba share if needed
- Step 4
Change user home directory
usermod --home /data/username username
Enable ssh access for user if needed
chsh -s /bin/bash username
Hacks
- In order to set the correct hostname enter the following command as a user into the shell. During firmware upgrades or similar procedures the hostname could default to storage, thus when adding a new user the sent email will have wrong links address.
hostname storage.ims.ut.ee
- To give some user ssh access to the machine following command has to be used. This might default under rare conditions back to /bin/false
chsh -s /bin/bash username
- All user should have their home directory in /data/username directory. This can be achieved using the following command
usermod --home /data/username username
- All file permissions are handled with acl. Thus, editing them should be done from the webinterface. If for some reason interface does not have needed entries, then getfacl and setfacl commands should be used.
getfacl /data/folder # this lists the permissions
setfacl -R -m u:username:rwx /data/folder # this adds permissions for a user
setfacl -R -x u:username /data/folder # this removes permissions for a user
